The Story of My Tools: Why I Still Use Hand Planes in a Digital Age

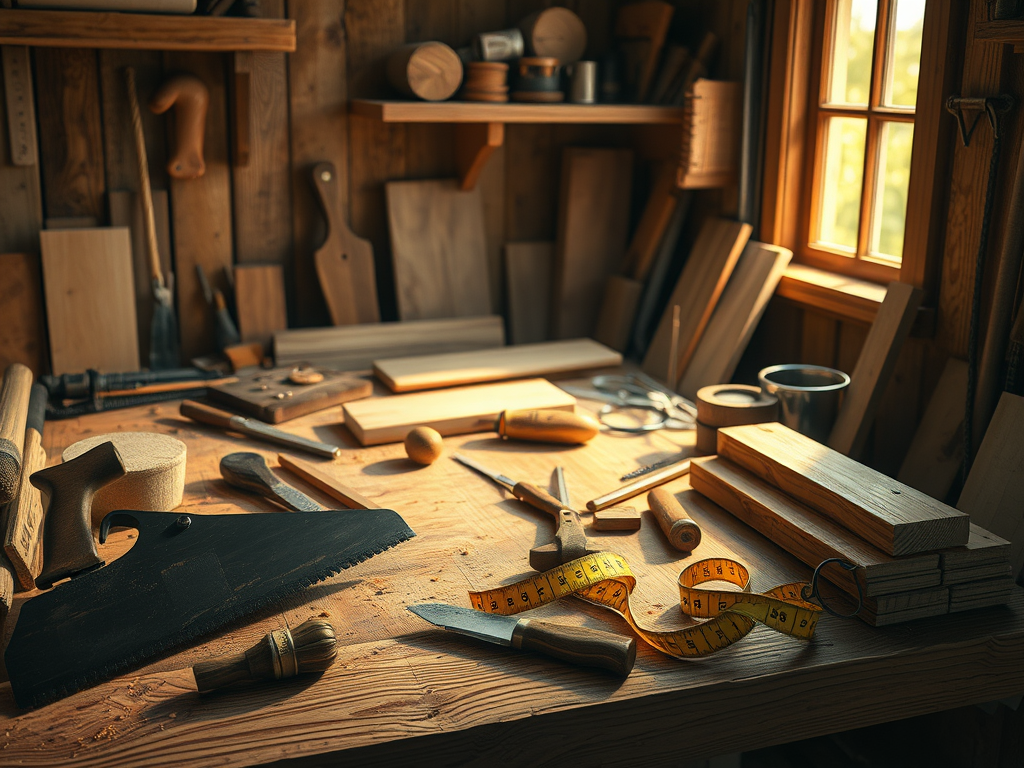
The modern workshop is often a place of screaming motors, the ozone tang of high-speed friction, and the fine, choking dust of the CNC router. In this digital age, precision is measured in microns on a glowing screen, and “craft” is often just a button pressed on a computer.

Yet, on my bench sits a tool that hasn’t fundamentally changed since the Roman Empire: the hand plane.

To the uninitiated, it is a heavy block of iron and wood. To me, it is the bridge between the soul of the tree and the hands of the maker. Here is why—despite the allure of the machine—the hand plane remains the heartbeat of my shop.

The Symphony of the Shaving

There is a specific silence that accompanies hand tool work. When the lights go down and the dust collector is switched off, the shop transforms.

Using a hand plane is a sensory conversation. As the blade—honed to a mirror-polished edge—meets the wood, you don’t just hear the work; you feel it. There is the scritch of the initial bite, followed by a long, rhythmic shush as a ribbon of wood, thin as a bee’s wing and translucent as silk, curls out of the throat and falls to the floor.

In those moments, you aren’t fighting the timber; you are listening to it. The resistance in the handle tells you of a hidden knot; the change in sound warns you that the grain has flipped, requiring a gentler touch.

Precision You Can Feel, Not Just Measure

Digital tools offer a cold, mathematical perfection. But wood is not a mathematical substance. It is a living, breathing history of rain, wind, and sun.

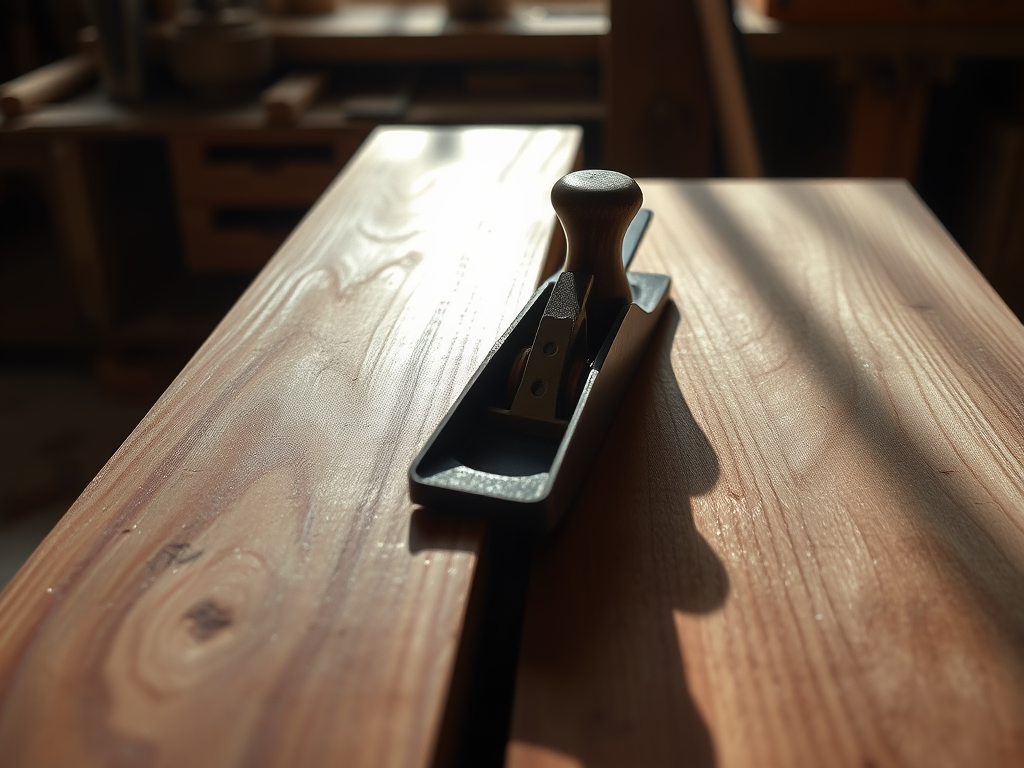
A machine thickness planer leaves behind “snipe” and tiny rhythmic ripples called mill marks. To the eye, it looks flat. To the touch, it feels processed. A hand plane, however, leaves a surface that is optically and tactilely superior. When a smoothing plane is dialed in perfectly, it severs the wood fibers so cleanly that the surface requires no sandpaper. Sanding chokes the pores with dust, dulling the natural luster. A planed surface reflects light like a gemstone, revealing the “chatoyancy”—that shimmering, three-dimensional depth within the grain—that no machine can replicate.

[Image showing the difference between a sanded wood surface and a planed wood surface]

The Human Connection to the Heirloom

When I build a piece of furniture, I am mindful that it will likely outlive me. I want the person who runs their hand under the apron of a table a hundred years from now to feel the ghost of the maker.

The slight, nearly imperceptible undulations of a hand-planed surface are the “fingerprints” of the craftsman. In a world of mass-produced, injection-molded uniformity, these subtle textures are a protest. They shout that a human being was here. A human being sweated over this joint. A human being cared enough to spend an hour chasing a single shaving.

The Meditative Pace

We live in a “now” culture. We want the table finished by Tuesday and the kitchen remodeled by Friday. Using hand planes forces a different tempo. It demands a steady stance, a focused mind, and a rhythmic breath.

It turns woodworking from a manufacturing process into a meditation.

I use hand planes because they keep me grounded. They remind me that beauty cannot be rushed, and that the most profound “technology” we possess is the coordination of the eye, the hand, and the heart.

Choosing the Right Tool for the Task

While my shop houses many planes, these three are the pillars of my process:

ToolPurposeThe “Feeling”
The Jointer PlaneTo make long edges perfectly straight.The heavy, authoritative glide of true alignment.
The Jack PlaneThe workhorse for removing bulk material.A vigorous, athletic dance of transformation.
The Smoothing PlaneThe final touch before finishing.The delicate, whisper-quiet perfection of a master’s stroke.

In the end, I use hand planes because they turn a piece of lumber back into a piece of art. The machines give me the shape, but the hand tools give me the soul.

Are you looking for a piece of furniture that feels as good as it looks? [Explore our custom gallery] or [Contact the shop] to start your heirloom project today.

The Raw Scent of Potential: Essential Tools for the Beginner Woodworker

There is a specific, intoxicating magic that happens the moment you step into a woodshop. It’s the scent of freshly sheared pine—sharp and resinous—mingling with the earthy, chocolatey aroma of walnut dust. You run your hand over a rough-sawn board, feeling the rhythmic ridges left by the mill, and you realize: I can turn this into something beautiful.

But for the beginner, the tool aisle can be an overwhelming sea of gleaming steel and high price tags. You don’t need a shop full of industrial machinery to start your journey. To transform a raw plank into a smooth, functional heirloom, you only need a few “soul” tools.

Here is your essential guide to the first tools every woodworker should own.

1. The Measuring Tape and Speed Square

Precision is the foundation of the craft. Before you cut, you must listen to the wood. A high-quality measuring tape should feel heavy and substantial in your palm, with a blade that snaps back with a satisfying metallic thwack.

Pair this with a Speed Square. This solid chunk of aluminum feels cool to the touch and provides a rock-steady 90-degree reference. When you scribe your first line with a sharp pencil, the graphite should glide effortlessly against the metal, leaving a crisp, dark boundary for your saw to follow.

2. The Pull Saw (Ryoba)

While many gravitate toward heavy American-style handsaws, there is a delicate intimacy to the Japanese Pull Saw. Unlike Western saws that cut on the push, the Ryoba cuts on the pull stroke.

As you draw the blade toward you, you’ll feel the teeth bite into the wood fibers with a surgical hiss. Because the blade is under tension while cutting, it can be incredibly thin, leaving a “kerf” (the width of the cut) that is as narrow as a fingernail. It’s a tool that rewards grace over brute force.

3. A Set of Bench Chisels

A chisel is an extension of your hand. For a beginner, a simple set (1/4″, 1/2″, and 1″) is plenty. When properly sharpened, a chisel doesn’t just cut wood; it peels it.

Imagine the sensation of paring a thin shaving of cherry wood—the way the timber curls into a translucent, golden ribbon that smells like autumn. The handle should seat firmly in the crook of your thumb, giving you the control to pare down a joint until it slides together with a perfect, airtight “whoosh.”

4. The Block Plane

If you want to experience the true “sensory” side of woodworking, buy a Block Plane. This small, palm-sized tool is used to chamfer edges and smooth end-grain.

Adjusting the blade is a tactile ritual. You’ll hear the pitch of the tool change as it engages the wood—from a hollow scratch to a deep, melodic shuck. When the blade is set just right, it produces shavings so thin they float in the air like lace, leaving behind a surface so reflective it feels like polished silk.

5. Random Orbital Sander

We often dream of the “hand-tool only” life, but the reality of finishing involves sanding. A Random Orbital Sander is your best friend.

As it hums in your hand, you’ll watch the rough, fuzzy texture of the wood vanish. It’s a transformative process: the dull, dusty surface slowly wakes up, revealing the shimmering “chatoyancy”—that cat-eye glow—hidden deep within the grain.

6. Clamps (The “Silent Partners”)

You can never have too many, but start with four 6-inch F-style clamps. They provide the muscular squeeze needed to hold a glue-up together. There is a profound sense of closure when you tighten a clamp and see tiny beads of glue “squeeze out” from the joint, signaling a bond that will likely outlast the house it sits in.

Key Take away: Start Small, Build Deep

Your first shop shouldn’t be a museum of expensive gadgets. It should be a sanctuary of focused intent. Start with these few essentials, and you’ll find that the most important tool isn’t made of steel or iron—it’s the calloused skin on your palms and the quiet confidence that comes from turning a tree into a treasure.

Are you ready to make your first cut?

Behind the Craft: How Our Wooden Furniture Is Made with Care and Precision

Behind the Craft: How Our Wooden Furniture Is Made

Wooden furniture has long been admired for its durability, beauty, and timeless appeal. At our store, every piece is more than just furniture — it’s a reflection of craftsmanship, quality materials, and design innovation. But how exactly is wooden furniture made? Let’s take you behind the scenes.

Selecting the Right Wood

The process begins with choosing high-quality, sustainable wood.

  • Hardwoods like oak, teak, and mahogany are known for strength and elegance.

  • Softwoods like pine and cedar offer affordability and rustic charm.

  • All our wood is carefully sourced to ensure sustainability and longevity.

Designing with Purpose

Every piece starts as a concept sketch or digital model. Our designers consider:

  • Functionality and comfort.

  • Current furniture trends.

  • Proportions that fit modern living spaces.
    This ensures our wooden furniture combines style with practicality.

Precision Cutting and Shaping

Once the design is approved, the wood is cut and shaped:

  • Hand tools allow for detailed craftsmanship.

  • Modern machinery ensures precise cuts and consistency.

  • Traditional joinery methods like dovetail joints add strength without compromising beauty.

Handcrafted Detailing

This is where artistry comes to life. Skilled woodworkers add:

  • Carvings, inlays, and textures for a unique finish.

  • Sanding for a smooth surface.

  • Attention to grain direction, which enhances the natural beauty of the wood.

Finishing Touches

To protect and enhance each piece, our craftsmen use:

  • Stains and oils to highlight wood grain.

  • Protective varnishes for durability.

  • Eco-friendly finishes that are safe for your home and the environment.

Quality Check and Delivery

Before leaving our workshop, every item goes through strict quality inspections to ensure it meets our standards. The result? Wooden furniture that is built to last and designed to impress.

Our wooden furniture isn’t just manufactured — it’s crafted with passion, skill, and care. From raw timber to finished masterpiece, each step honors traditional woodworking techniques while embracing modern innovation. When you choose our furniture, you’re investing in quality, durability, and timeless style.

Easy Tips for Cleaning Upholstered Chairs and Sofas: Keep Your Furniture Fresh and Stylish

Your upholstered chairs and sofas are the centerpiece of your living room, but they can quickly collect dust, stains, and everyday wear. Keeping them clean doesn’t just improve their appearance — it also extends their lifespan and makes your home more inviting. Here are some easy, effective tips for cleaning upholstered furniture to help you maintain both comfort and style.

1. Vacuum Regularly

Dust, crumbs, and pet hair easily settle into fabric fibers.

  • Use the upholstery attachment on your vacuum.

  • Pay special attention to crevices and under cushions.

  • Vacuum at least once a week to prevent buildup.

2. Blot Spills Immediately

Accidents happen! The trick is quick action.

  • Blot, don’t rub – rubbing spreads the stain deeper into the fibers.

  • Use a clean, dry cloth to absorb as much liquid as possible.

  • For water-based spills, follow with a slightly damp cloth.

3. Use the Right Cleaning Solution

Always check your sofa’s cleaning code tag (W, S, WS, or X) before applying products.

  • W (Water-based): Use mild soap or upholstery cleaner.

  • S (Solvent-based): Dry-cleaning solutions are safest.

  • WS (Water or Solvent): Either option works.

  • X (Vacuum only): Stick to vacuuming and professional cleaning.

4. Remove Stains Safely

  • Food & drink stains: Mix mild dish soap with warm water, blot gently.

  • Grease stains: Sprinkle baking soda, let sit, then vacuum.

  • Ink stains: Dab with rubbing alcohol on a cotton ball, blot carefully.

5. Freshen Upholstery Naturally

To keep your chairs and sofas smelling fresh:

  • Sprinkle baking soda on the surface, leave for 15 minutes, then vacuum.

  • For a light scent, mix a few drops of essential oil with water and lightly mist (test fabric first).

6. Protect with Fabric Covers or Sprays

  • Use washable slipcovers for high-traffic furniture.

  • Apply a fabric protector spray to repel spills and stains.

  • Rotate cushions regularly to ensure even wear.

7. Schedule Professional Cleaning

Even with regular care, professional deep cleaning every 12–18 months helps preserve your furniture and removes stubborn dirt.

Just to wrap this up, keeping your upholstered chairs and sofas clean is simple with consistent care. By vacuuming, blotting spills, using the right solutions, and protecting your fabric, you’ll maintain furniture that looks stylish and feels inviting for years to come. Clean furniture not only enhances the beauty of your living room but also improves comfort, ensuring your home always feels fresh and welcoming.